Deploy RabbitMQ
RabbitMQ is an open-source message broker that facilitates the efficient transfer of data between applications and services. Its robust messaging system allows for the decoupling of data producers and consumers, ensuring data flows smoothly and reliably. RabbitMQ is available in the ExyData Platform.
Deploy RabbitMQ in the ExyData Platform
Considerations
-
Size: The size of the instance that you want to deploy. You can see the available sizes here. The size of the instance will affect the performance of your queries. You will want to choose the size that fits your needs.
-
Region: The region where you want to deploy your instance. You can see the available regions here. This is important because the region will affect the latency of your queries. You will want to deploy your instance in the region that is closer to your users and yours data sources.
Deploy
Deploying a new RabbitMQ instance is very easy. You just need to run the following command:
exy deploy \
--cloud aws \
--database rabbitmq \
--org_id your-org_id \
--token your-awesome-token \
--plan professional \
--region us-east-1
The response will be a JSON object with the following properties:
{
  "cloud": "aws",
  "resource_id": "5c9f5b5c",
  "database": "rabbitmq",
  "org_id": "your-org_id",
  "plan": "professional",
  "region": "us-east-1",
  "created_at": "2019-03-27T12:34:56.789Z",
}
You will receive an email with the information that you need to start to use the service.
The deployment process can take a few minutes. Up to three minutes.
Access your RabbitMQ UI
You can access to the management UI of your RabbitMQ instance using the following URL (replace the resource_id with the value that you received in the email):
https://5c9f5b5c.customers.exy.io
:::tip::: You can find the URL of your instance in the email that you received after deploying your instance. Along with the URL, you will receive the credentials that you need to access the UI. :::
Login
Login to your RabbitMQ instance using the credentials that you received in the email.

Once you are logged in, you will see the RabbitMQ management UI.

Change the password of your RabbitMQ instance
Is highly recommended that you change the password of your RabbitMQ instance. You can do it using the following steps:
Login to your RabbitMQ instance using the credentials that you received in the email.
Click on the admin tab and select rabbitadmin from the list of the users.
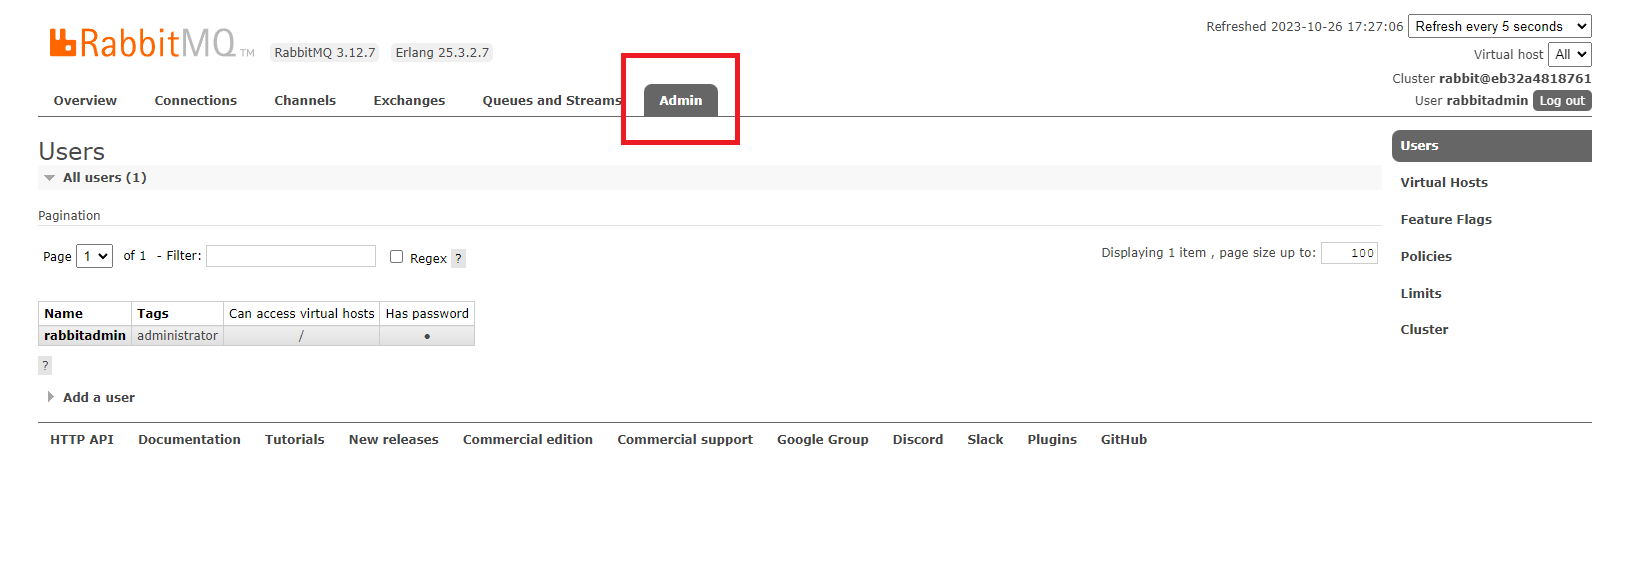
Scrolldown to the bottom of the page and in the Update this user section, enter the new password and click on the Update user button.

Ready to roll?
Now that you have your RabbitMQ instance up and running, you can start to use it. You can find more information about how to use RabbitMQ in the official documentation.
If you have any questions, please contact us at [email protected] or sign up to the Time Series Community Slack.